01Safety
A line, not a dot
The optical system developed by TeslaCoilPro engineers fans every beam into a 60–110° line. Power is spread along its whole length, and R, G and B leave as separate diverging lines. Beyond ~4 metres from the aperture the wall is eye-safe — the usual scanning-laser prohibitions do not apply to it.
- The line must be even. A bright dot or clump means damaged optics: power off, service.
- Never disassemble the optics: without them this is an ordinary point laser with all its hazards.
- Keep concave and focusing surfaces out of the beam (flat glass and mirrors are fine — they only redirect the line).
- Never aim at roads or aircraft — that is law, not optics.
02Installation
Mount and connect the module
- 01
Mount
Stock hardware, stable support, no cable tension that could swing the body.
- 02
Aim
The first 4 metres out of everyone's reach.
- 03
Connect
All cables with power off, by connector markings.
- 04
Power up
Standing beside the aperture: a brief blue flash is possible on cold start.
03Connect
Connect the phone
The app remembers the wall and reconnects on its own afterwards.
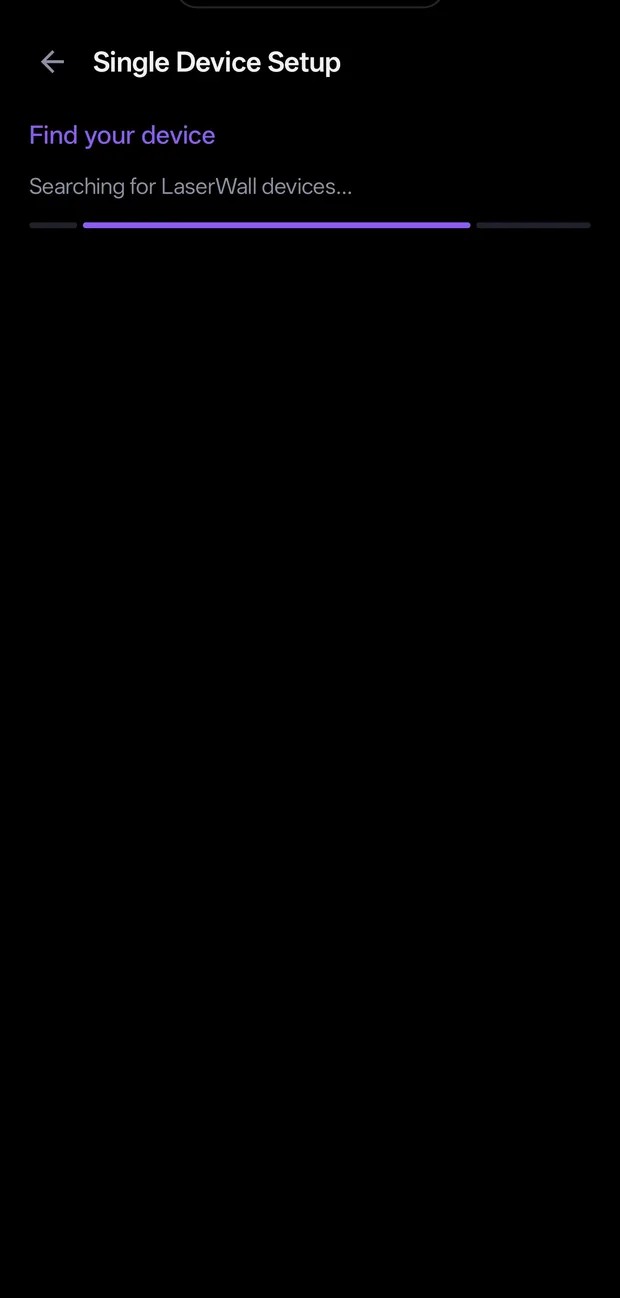
- 01
Turn on Bluetooth
Grant Android nearby-devices access when it asks.
- 02
Devices → “Set up single device”
On first launch the app offers the choice itself — pick “Single device”.
- 03
Pick your wall from the list
Keep the phone close until “Device connected!”, then “Done”.
04Colors
First light and looks
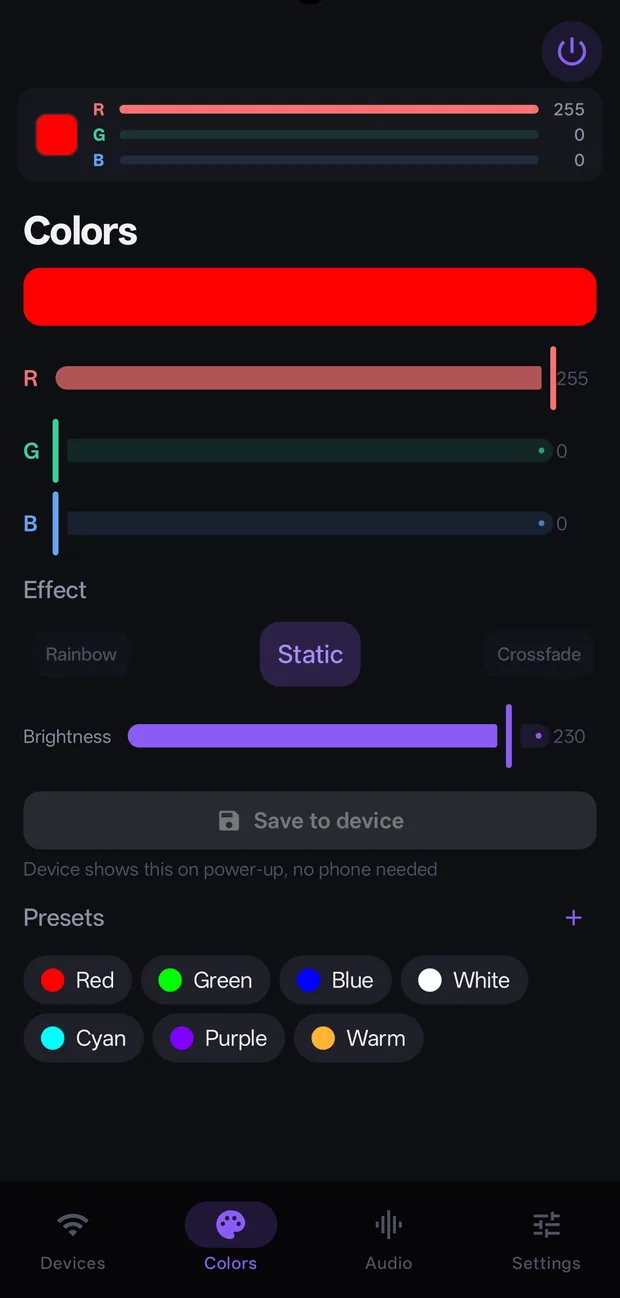
- 01
Check the channels
“Effect” → “Static”, moderate “Brightness”, move R, G and B one at a time. Every channel responds, the line stays even.
- 02
Pick an effect
“Crossfade”, “Jump”, “Breathe”, “Strobe”, “Rainbow” — plus “Speed”. Strobe is an audience-comfort call.
- 03
Save the look
Presets live in the app. “Save to device” writes the look into the wall for phone-free start.
05Audio
Light from music
The phone listens through its mic and drives the wall live.
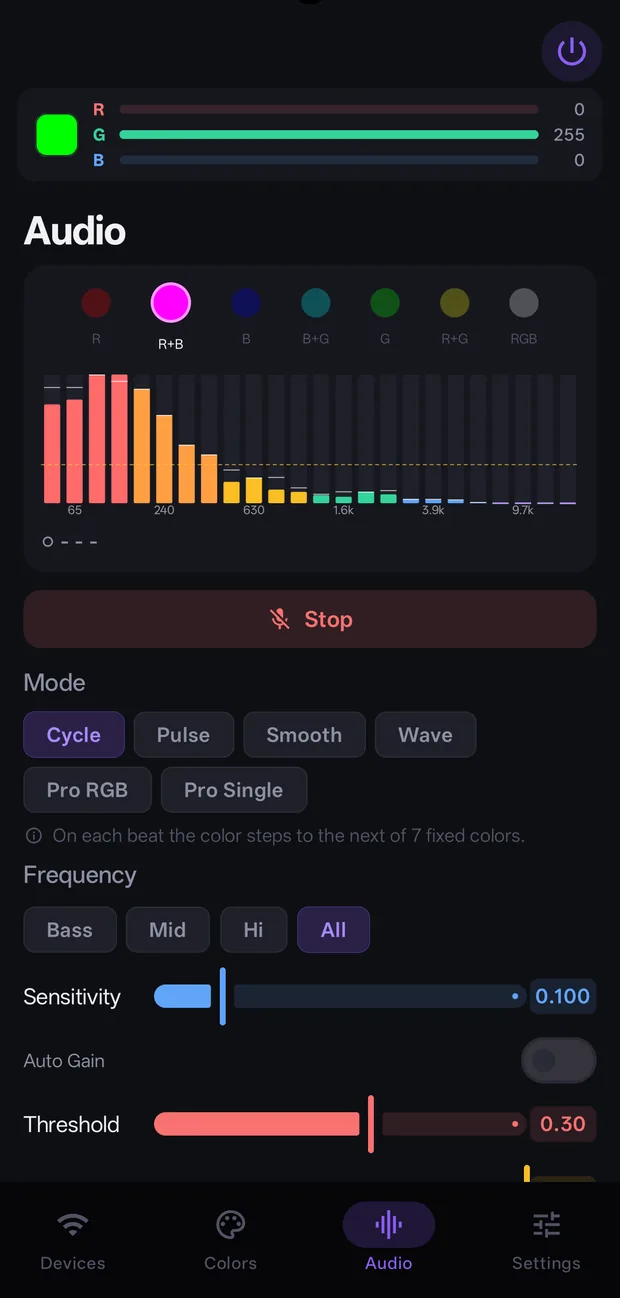
- 01
Tap “Start”
Grant mic access. If it won't start, another app holds the mic.
- 02
Pick a mode
“Cycle” steps color each beat; “Pulse” adds loudness; “Smooth” walks the hue; “Wave” rolls RGB. Every mode has a (?) explainer.
- 03
Tune out the noise
“Threshold” cuts false beats; “Auto Gain” handles drifting volume.
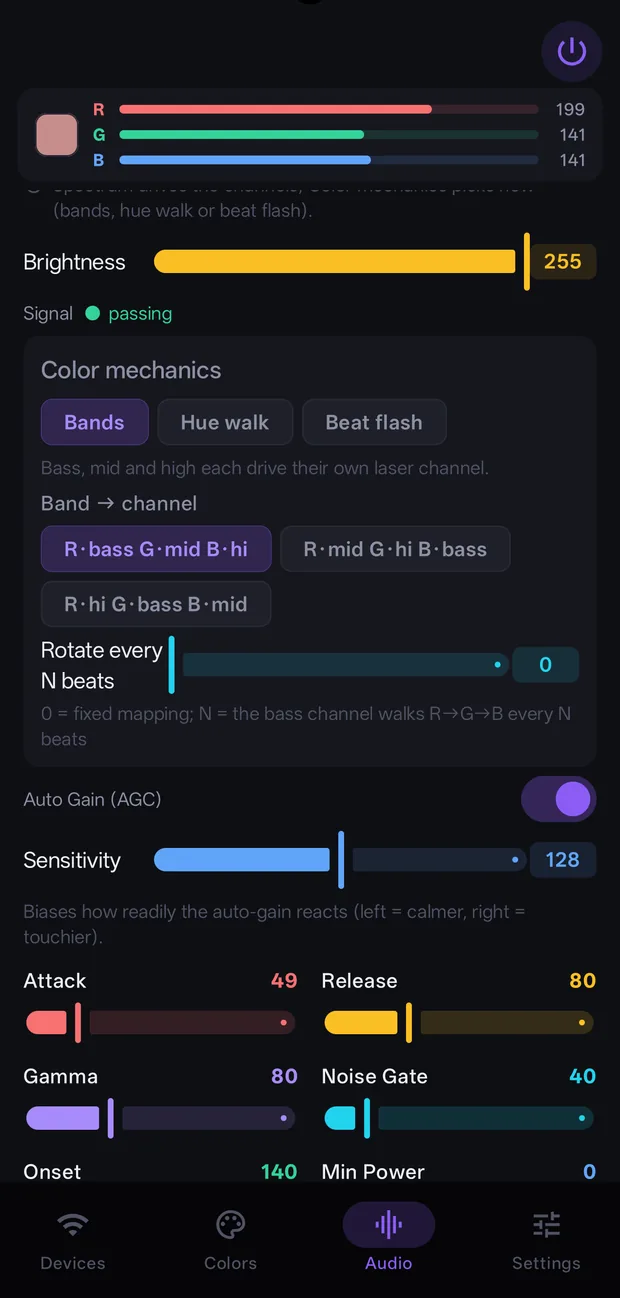
Pro modes
- Pro RGB: bass, mid and high each drive a channel. “Color mechanics”: “Bands” (rotating every N beats), “Hue walk”, “Beat flash”.
- Pro Single: one energy band, one chosen color.
- Roman: a beat tracker drives the colour changes, so they land on the beat instead of on any loud noise. “Mic Gain” matches the input to the venue, “Floor” keeps the wall glowing through silence, “Color change” sets how often the picture changes.
- The “Signal” indicator: gate closed while music plays — lower “Noise Gate”, don't touch brightness.
06Phone-free
Autonomous start
After “Save to device” the wall shows the look as soon as power arrives, at exactly the brightness that was saved. So save the look at working brightness, and apply power with the near zone clear: no phone is needed for this any more. Audio does not work autonomously: the mic is in the phone. Rehearse one power cycle before the show.
07Firmware
Updating
The “Firmware” row on the wall's card shows the version and an update button when the app carries a newer one. Keep the phone close during the update and don't cut power. “Reinstall firmware” re-writes the same version if the wall misbehaves.
08Settings
What to leave alone
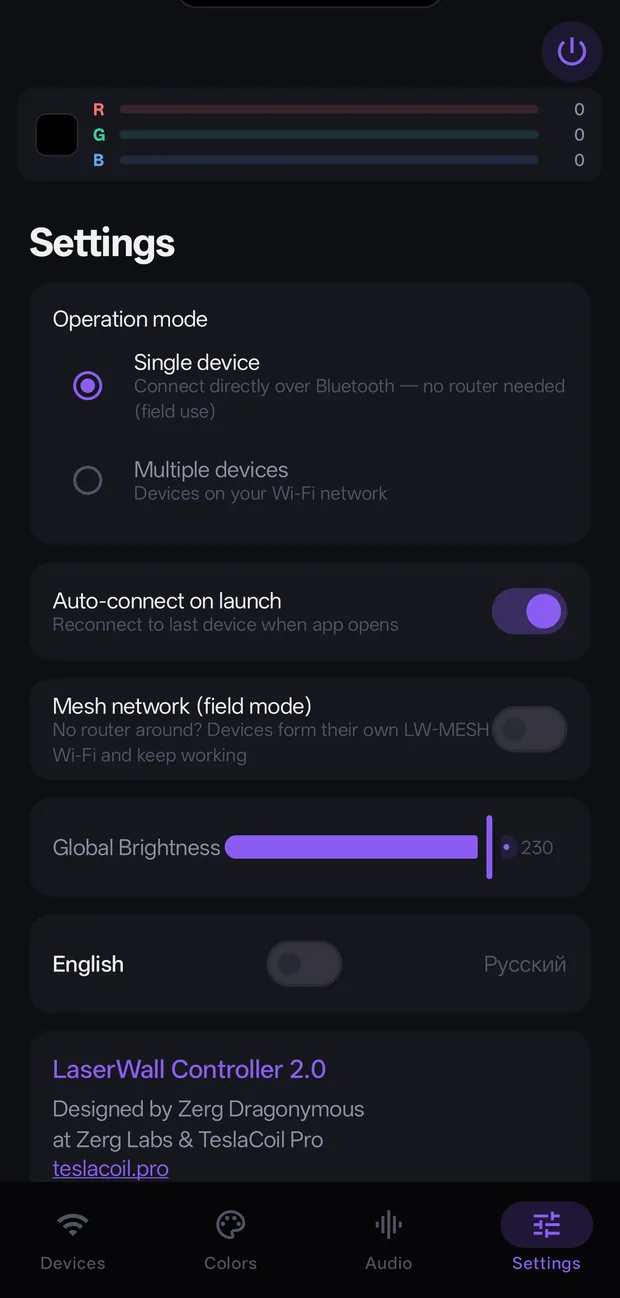
- “Operation mode” — “Single device”. Network and fleet settings belong to the several-walls guide; leave them alone here.
- “Auto-connect on launch” — the link restores itself when the app opens.
- “Global Brightness” — the ceiling for everything the app outputs.
- “Text size” — 100/110/125/150%, for a screen that is hard to read in the dark or on stage.
09Troubleshooting
If it doesn't work
| Symptom | What to do |
|---|---|
| Wall not found in scan | Power, Bluetooth, permissions; move closer, rescan. |
| Link keeps dropping | Move closer, check power, reconnect via the wizard. |
| Colors won't change | “Audio” → “Stop”. |
| Audio doesn't react | Mic permission; lower “Threshold” or “Noise Gate”. |
| One colour stays on and will not dim | A broken control wire for that colour inside the module. If the other colours obey, it is the wiring: send the module to service. |
| Update failed | Leave power on, wait for the wall to return, retry. |
10Before the show
Checklist
- The first 4 metres are out of the audience's reach; nobody can look into the aperture.
- The line is even, optics clean, mounting and cables checked.
- “Static” confirmed all three channels.
- A look is saved, or audio rehearsed at show volume.
- After the show: “Stop” in Audio, output killed, power off.